deskcal
A very small oscilloscope that measures one signal: how long until my next meeting. A Raspberry Pi counts down, draws the day as a waveform, and chimes five minutes before I have to be somewhere.
- Year
- 2026
- Made with
- Raspberry Pi 5, a 3.5-inch touchscreen, Python and PyQt5, Google Apps Script, OpenSCAD, about 250 g of PLA
- I did
- Everything: the app, the calendar feed, the stand
- Links
- Source on GitHubStand files
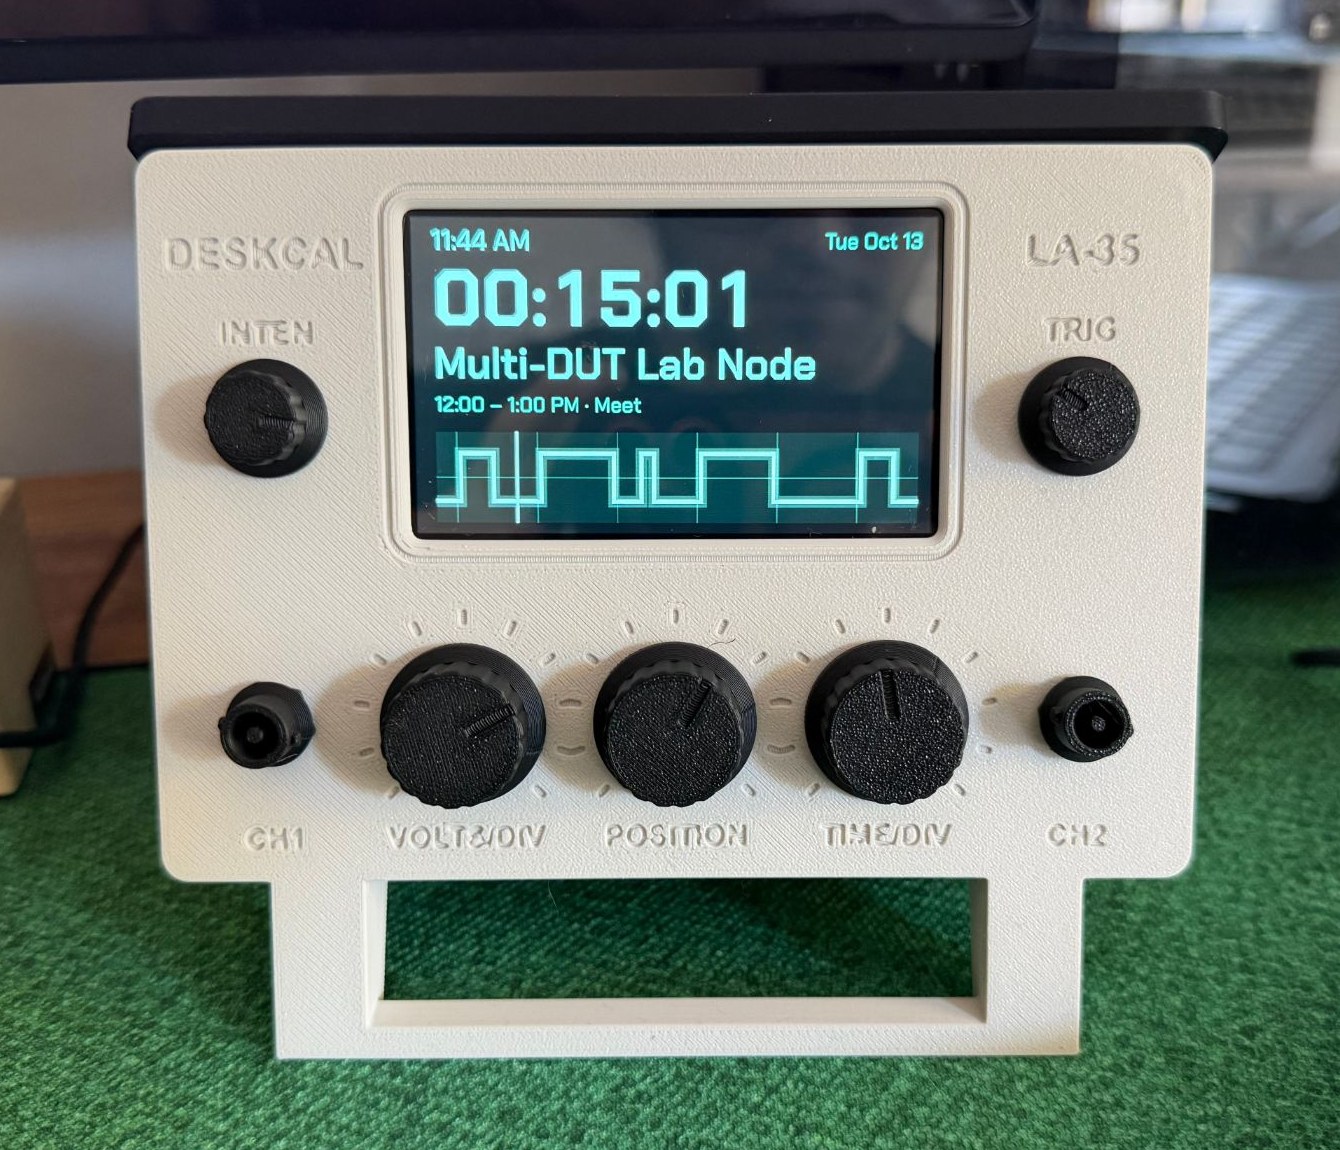
The question I ask my calendar most is "what's next, and how long do I have?" That seemed worth a dedicated screen: one that sits on the desk, shows the meeting I'm in and the one coming up, and makes a noise before I'm late.
The display turned out to be the easy part. The hard part was getting at the calendar at all, because work accounts tend to block third-party apps, secret iCal links and external sharing, which is every normal way in.
The first version signed in through the Google Calendar API, which is exactly the kind of outside app a work account turns away. So the calendar gets published from the inside instead. About forty lines of Google Apps Script run as me, inside the account, and serve the next week of meetings as JSON. The Pi polls that URL every five minutes.
The feed carries only what the display draws: titles, times, locations and which video call it is. No attendee names, no emails, and descriptions are cut down to their links before they leave the account.
The day as a waveform
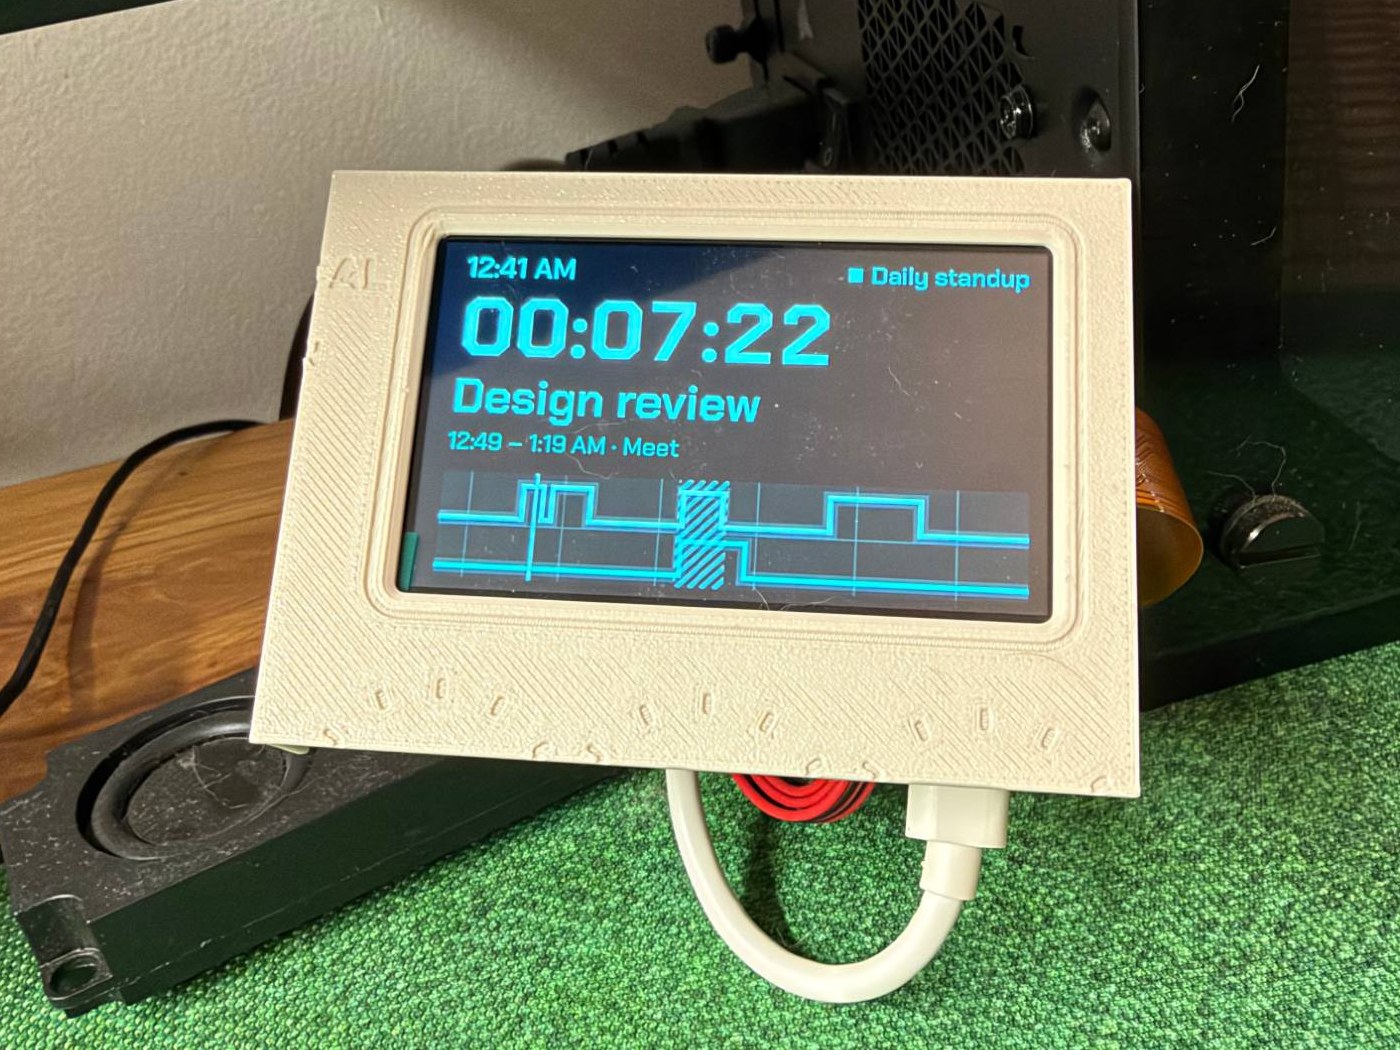
The screen is laid out like a logic analyzer. Up top, an hh:mm:ss countdown to the next meeting and its title. Underneath, the next few hours as a trace where every pulse is a meeting and the cursor is now. Double-book me and it becomes a collision: a banner, both meetings listed, and a second trace with the overlap hatched.
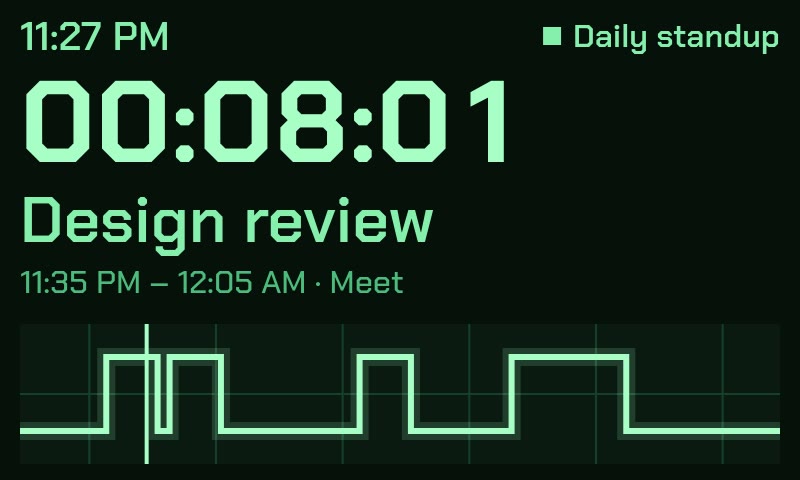
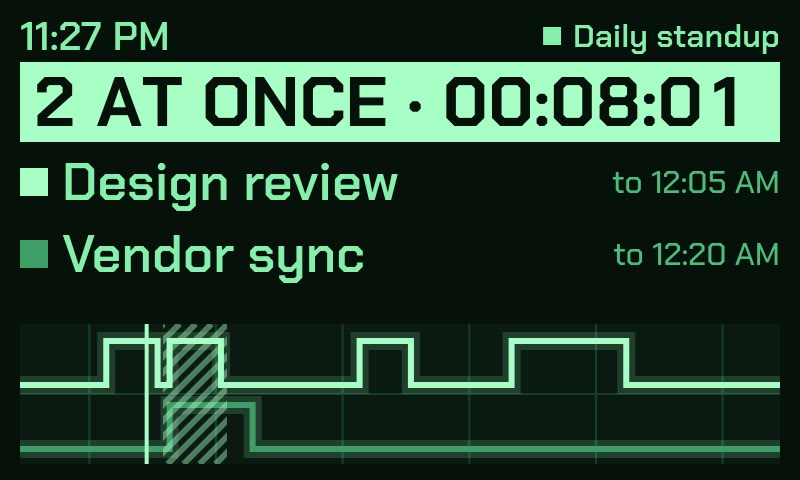
The panel is about 70 × 50 mm, so nothing is drawn smaller than 32 px. All-day events, cancellations, working-location and out-of-office entries, and anything I declined never make it to the screen.
Alerts
The chimes are synthesized in code, so there are no audio files to ship. There are three to pick from: bells, bench-instrument beeps, and the buzz of an old computer terminal.
When the network goes away
The last good download is kept on disk. A Wi-Fi blip, or booting before Wi-Fi is up, shows the schedule it already had with a red OFFLINE flag next to the clock, not a blank screen. A broken deployment answers with a sign-in page where the JSON should be, so the feed has to parse before it's allowed to replace the cache.
A stand in costume
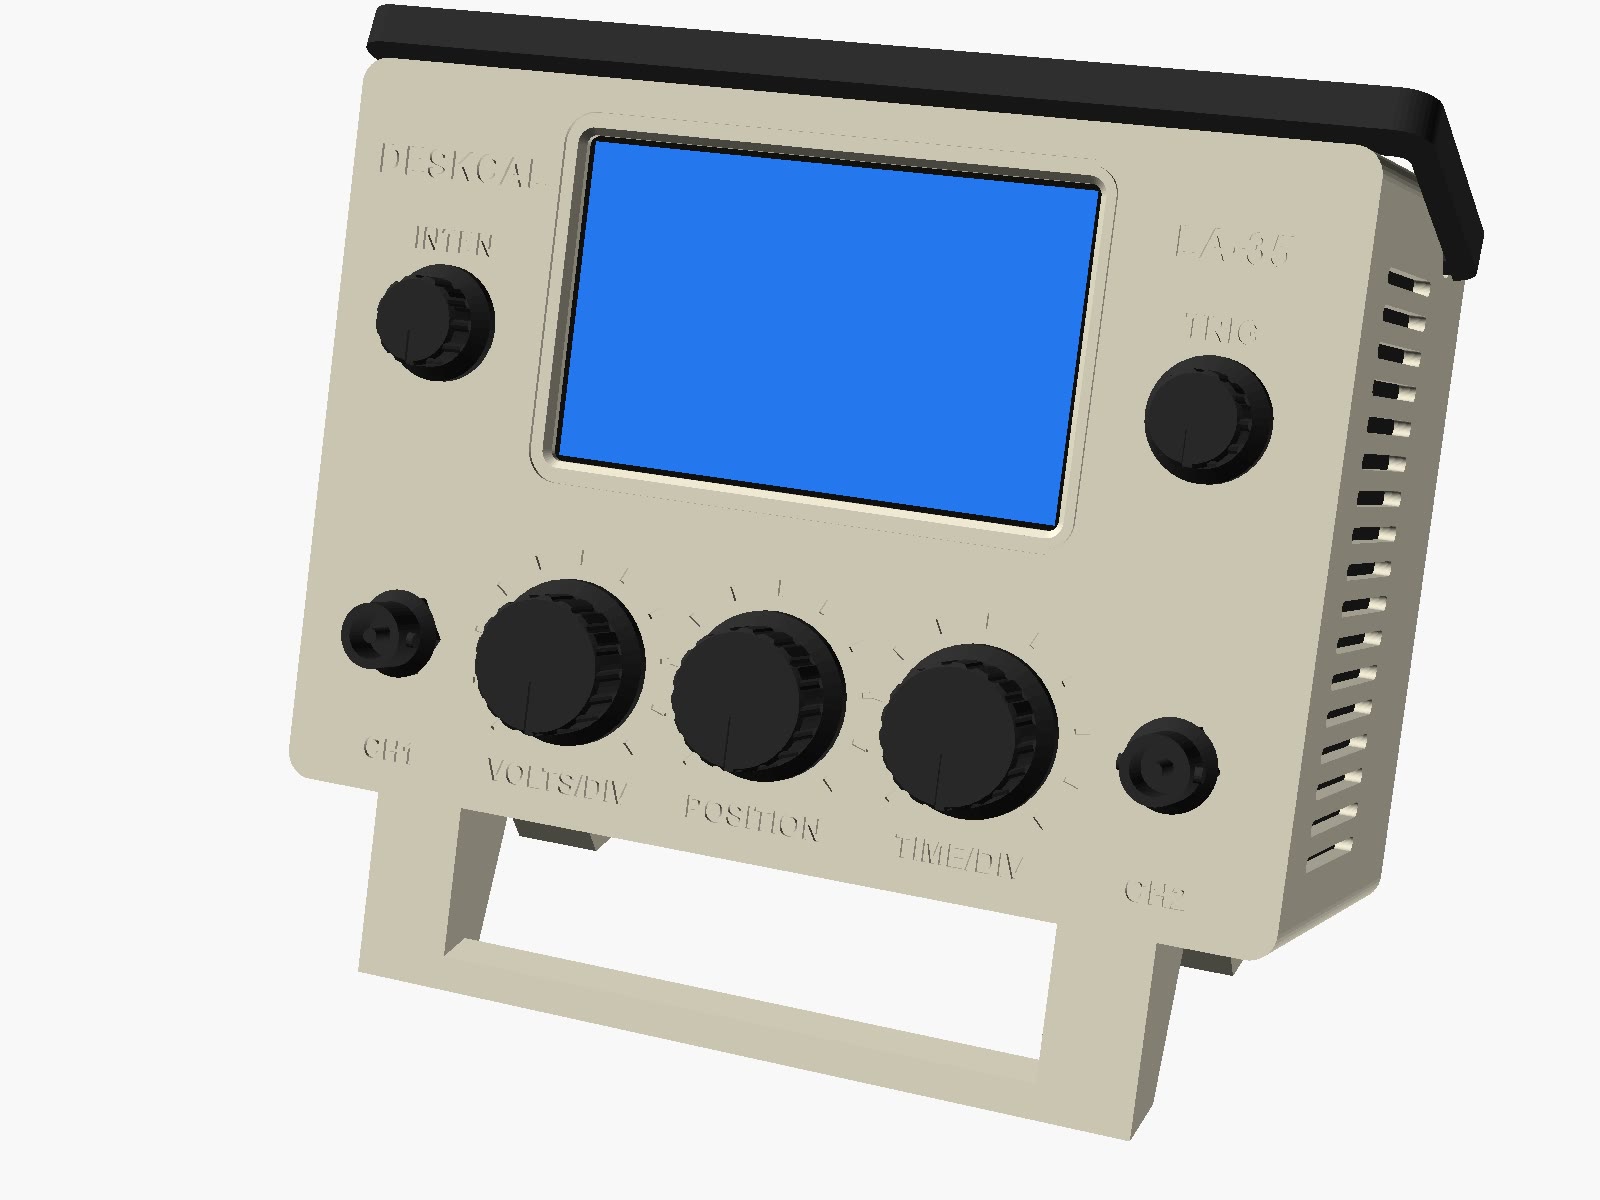
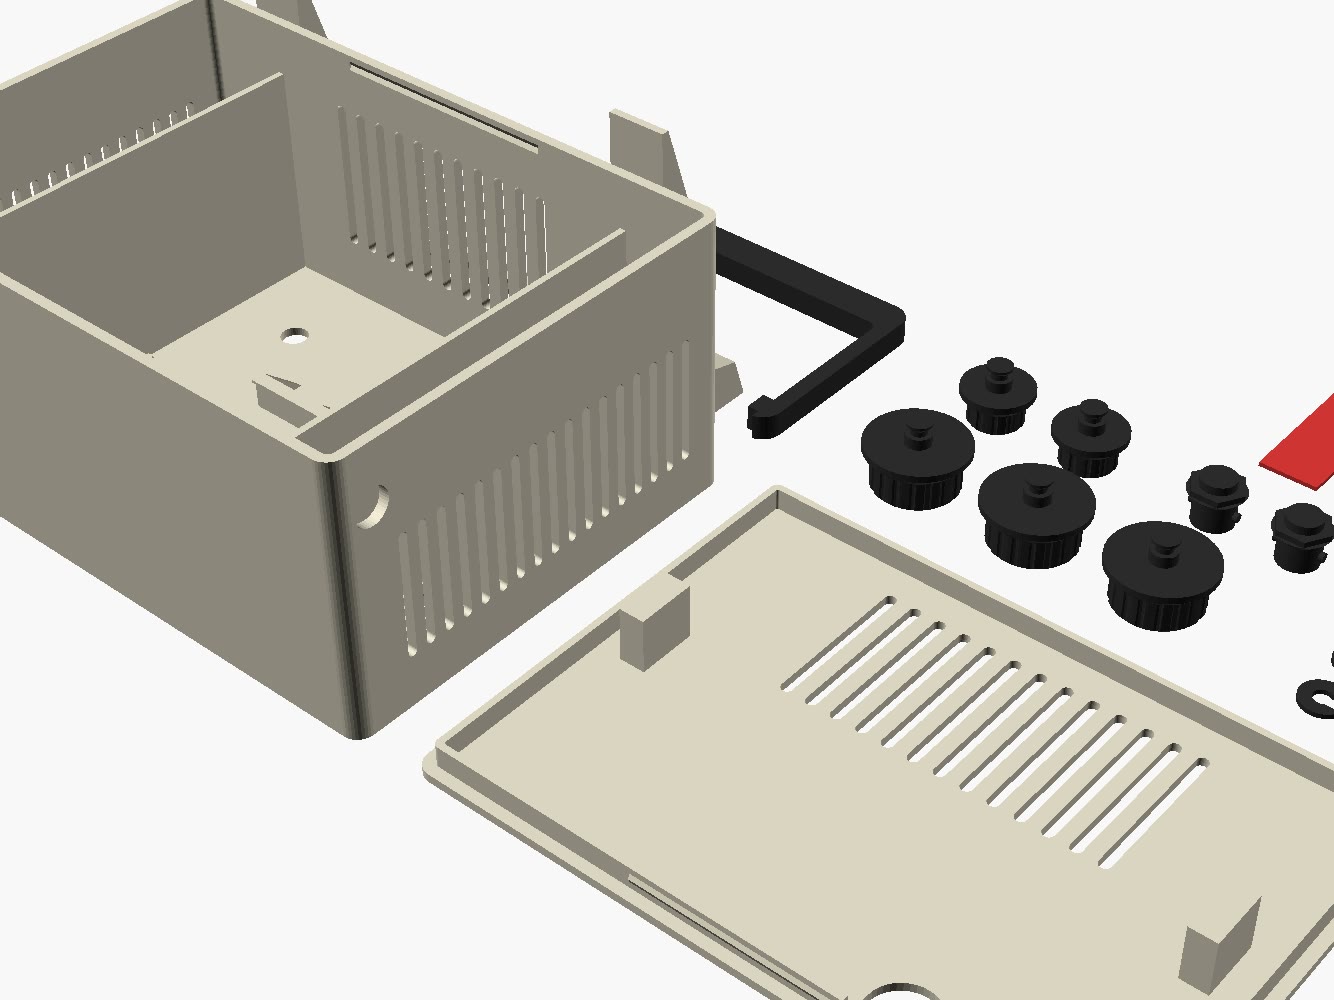
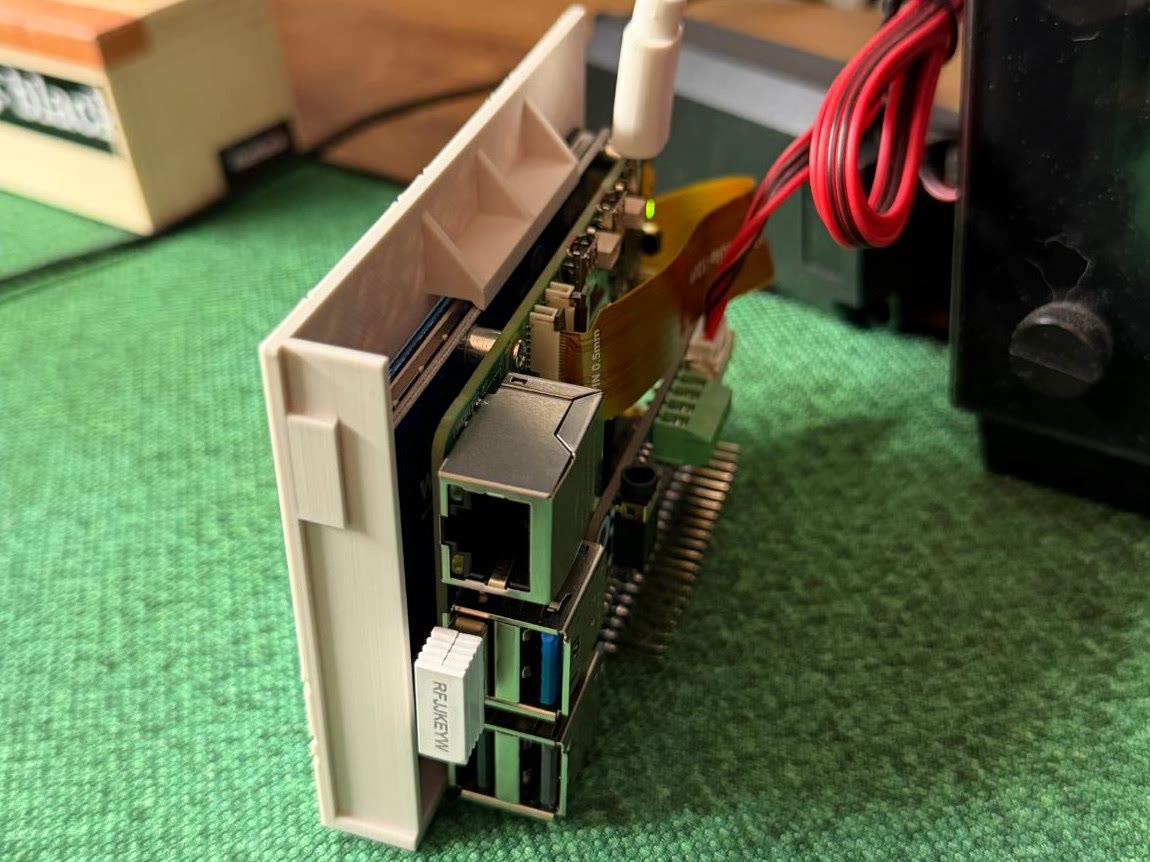
The display already looked like test equipment, so the stand became a mini oscilloscope: five knobs that spin, two dummy BNC jacks, a handle that folds flat along the top, and a model number on the panel. The Pi, screen, audio HAT and speakers slot in from the back. Nothing is screwed down, and the only glue is on the BNC jacks.
It's one parametric OpenSCAD file. Every part prints without supports, and fitting a different screen or speakers means changing a few numbers at the top.
Print the risky part first
The screen tilts in under the roof and drops onto a shelf, held by two lips that sit in the 3 mm gap between the display board and the Pi. That's a lot to trust to a drawing, so before the full case I printed only the section that holds the screen.
The first full print
The one on my desk is the first full print, and its speaker bays came out tight. The model has since been widened from measurements of the real speakers. That change hasn't been reprinted yet.
- 1
Ask from inside the account
An app knocking from outside needs approval. A script that runs as you is already in.
- 2
Print the risky part first
A fit test of the screen mount is a much cheaper way to be wrong than the whole case.
- 3
Measure the part in your hand
The speaker bays were tight until the model was redone from the real speakers.
- 4
Keep the last good answer
A stale schedule with an OFFLINE flag beats a blank screen every time Wi-Fi hiccups.
- 5
Keep the clock logic pure
What's on, what's next and which alert is due are plain functions with no I/O, so they're tested without a Pi.
- 6
Design for the size it really is
On a 70 × 50 mm panel, 32 px is the smallest thing worth drawing.
Heads up: anyone holding the feed URL can read your next week of meetings. If you build one, treat that URL like a password.